


My Favorite Rowing Drill: Rowing-in-Place (Video and More)
One of the first and best things I’ve learned at Craftsbury

I post this with some trepidation that people will think that making a video means I’m claiming this drill as my own. Rowing-in-place, or the “push-pull drill” as I’ve also heard it called, is one of the first drills that I learned when I started coaching at Craftsbury in 2019, and it quickly became one of my favorites for my own sculling and coaching. I’ve been unable to find a good, publicly available demo video to share this with people more broadly, so I did one.
I don’t claim to have invented anything, this drill or otherwise. I’m just trying to record in writing/video good things I’ve learned so that other rowers and coaches can use it too. In this case, I learned rowing-in-place first from Craftsbury coach and then-director Troy Howell, who learned it from Ellen Braithwaite, who learned to scull at Craftsbury and is an awesome open water rower and one of my favorite people to coach with. If she didn’t invent it herself, Ellen and Troy together are at least responsible for propagating it at Craftsbury. You may well know it already by another name or from someone else. Please comment or send in any credit, stories, or video submissions from others, and let’s all get better together.

I highly recommend watching Troy’s 2020 Craftsbury webinar, “Gaining Comfort and Confidence in the 1x,” to learn his framework for training single sculling as a nervous system experience, more about the rowing-in-place drill specifically at 32:40, and a whole lot more that any sculler can do to expand understanding, improve technique, and have fun in the single. Also watch Ellen’s contributions to the panel webinar, “But What Is That Drill For?” in which she talks about rowing-in-place and how she uses it.
Here are the key points of rowing-in-place and one way to use the drill in a technique-focused progression.
Key Technique Points
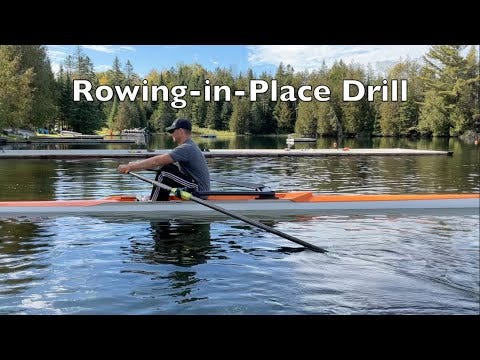
The drill at first is just moving slowly, going nowhere, hence the name “IN-PLACE.” Begin slowly, mindfully, and with far less effort in both directions than you think necessary. Those new to rowing-in-place usually fly up the slide to the stern, jam their feet down at the catch, flip or have a near-flip moment, and don’t learn much. Slow down and try to pay attention to the sensations at each point of the stroke: See how slowly you CAN go and how little you CAN move the boat.
I have seen a variation of rowing-in-place done as a single backing stroke straight into one or more full strokes from the catch. That’s one way to do it, but not the only way, and it’s not what we’re doing at first.
Keep blades squared and in the water the entire time (“drive” and “recovery”). Do not feather or let the blades lift out of the water at any point during the initial stage of rowing-in-place. Pay close attention to keeping the blades buried and handles flat and how horizontal the movement can be.
Rowing-in-Place Drill Progression
Here’s one way to use rowing-in-place build-ups to focus on one specific technical element of the stroke. Start at the start of the progression, not the end, and don’t be in a rush to get through it. The value is in going through the progression, not getting to the end of it. The goal is to build awareness and skill through each stage, not to get to the end just to check a box and move on.
Begin in-place: Do one set of 5-10 in-place strokes with no “release,” keeping the blades squared and buried going from the back-end (what would be the release) to the front-end (what would be the entry) and back again. Try to focus on one specific technical element. Stop for 30 seconds or so after each set and reset. You can do several sets this way to maintain focus on the goal technique. Repeat a few or several times, and then move to the next stage when ready.
Build-up 1: Reset and then take 1-3 in-place strokes followed by an actual release on the very last stroke to let the boat run. Repeat a few or several times, and then move to the next stage when ready.
Build-up 2: Reset and then take just one in-place stroke followed by three full normal strokes, building pressure on each stroke while continuing to focus on your goal technique. Repeat a few or several times, and then move to the next stage when ready.
Build-up 3: Reset and then take just one in-place stroke followed by 5-10 full normal strokes building up pressure and speed while continuing to focus on your goal technique. If you notice technique slipping after stroke #5, stop and reset rather than rowing sloppily through all 10.
I just want to introduce this drill for this week. Next week, I’ll write more about how I often use the drill during a Craftsbury session and with a strength coach twist. Until then, I’d love to hear your thoughts by comment or reply if you try it out yourself.